Blog

How to give limited JIRA access to guest users

14 November, 2022

  • 6 minutes

Jira

We can all agree that JIRA is great software. However, if you've tried to configure it, then you know that the simplest tasks can get too complicated. In this article, we will explain how to configure the JIRA cloud so that the guest users can have limited access to certain projects. Limited access feature comes in handy when you need to invite clients, external users, or guests to your JIRA but don't want to give them access to all your projects.

NOTE: This article is based on a default JIRA cloud configuration, so your base configuration could look different.

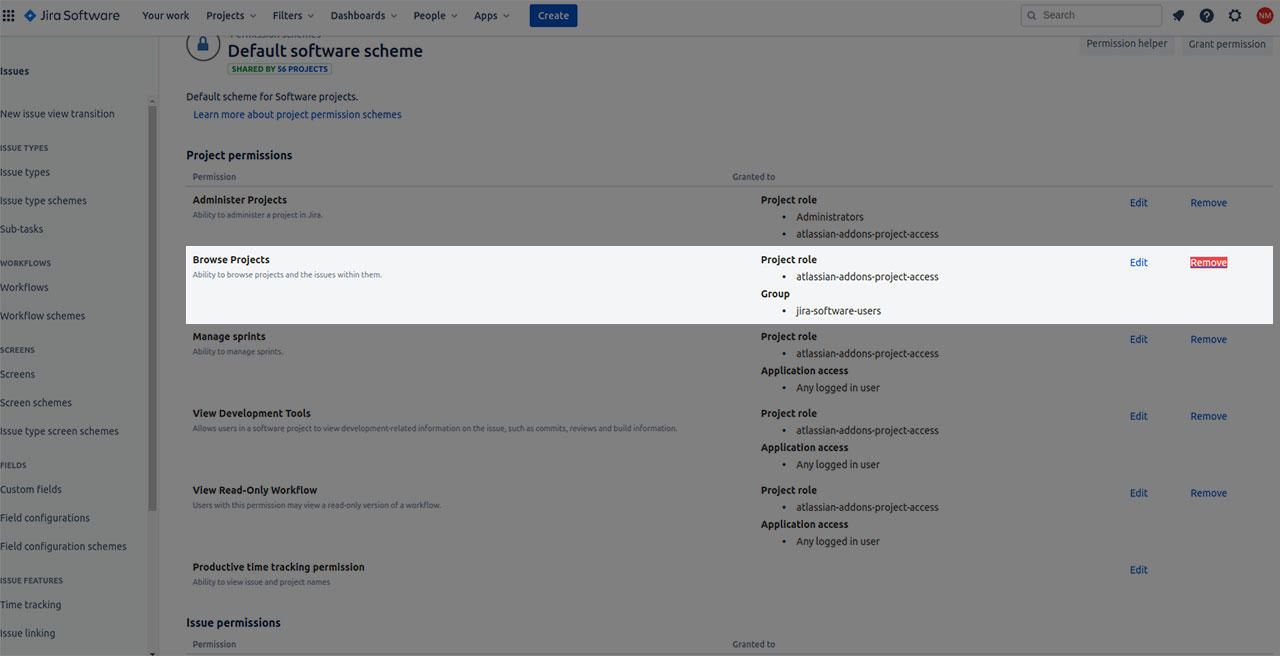
When you want to configure classic project permissions, you need to do it through permission schemes. The permission scheme defines different permissions for users, groups, or project roles in the system. Usually, there is only one permission scheme, often called the "Default software scheme".
All classic JIRA projects use this permission. By default, this permission is configured so that any logged-in user can browse projects and make changes to tickets, issues, etc. There are multiple permission levels in Jira. Therefore, you need to configure this default permission scheme to set limitations for external partners. We will show you how to remove any roles or permissions that you don't want your logged-in users to have.

Follow this 20-steps guide to give limited JIRA access to guest users:

1) Click on the "settings wheel" in the top right corner.
2) Choose Issues in the drop-down menu.

3) On the vertical menu on the left side, in the bottom corner, click on Permission schemes. This will show a list of permission schemes.
4) In the Default software scheme field, click on the Permissions button on the right side.

5) On the screen that opens, you can access permissions for logged-in Jira users that you want to remove. In this case, you want to remove permissions to Browse Projects and create issues.

With these new settings, only the "jira-software-users" group can browse projects and create issues. Without this configuration, any logged-in user is able to make these changes.

Create a new user group for your guest users and configure a permission scheme

1) Create a new group by going to the "settings wheel" in the top right corner, and select User Management.

2) In the top left corner, select Groups. Here you can see all groups from your JIRA cloud.

3) Press the Create Group button in the top right corner. Name the new group as you want, e.g. "Guest Users".
4) Now you want to create a new permission scheme that you can assign to your new group. Click on the "settings wheel" in the top right corner, and select Issues.

5) Click Permission Schemes in the lower-left corner of the vertical menu. The easiest way to create a new permission scheme is to copy an existing one. Click Copy on the right side.

6) After you have copied an existing permission scheme, you should rename it from "Copy of Default software scheme" to "Guest users scheme".
7) Once you're done with the previous step, click on the Permissions button on the "Guest Users scheme," and add the new group "Guest Users" to "Browse projects" and "Create Issues".

Change the permissions in the project where you want to invite your guests

1) Click on the Projects button in the main menu and click on the desired project or create a new project.
2) Go to Project settings.
3) In the left navigation menu, click on Permissions.
4) On the permissions page in the top right corner, click on the Actions button.
5) Select Use a different scheme.

6) Choose the new scheme that you previously created, in this case, "Guest users scheme".
7) By using the "Guest users scheme" the project can now be accessed by the "Jira-software-users" group, but also by the "Guest users group" as shown in the picture down below. This example shows the easiest case scenario, but there are endless possibilities and variations.I hope that you have the patience left for the final step of the configuration!

Assign guest users to the guest users group

1) Create a new user
2) Enter the new user's email address
3) In the Add groups field, assign your new guest user to the "Guest users group".

4) Important! Be careful not to add your new user to the "Jira-software-users" group because they will have access to everything.

Conclusion

By following this guide, we have re-configured the JIRA cloud so that any logged-in JIRA users can not view all projects, which is the standard for the JIRA cloud. This was a necessary step to be able to create a guest user that only has access to specific projects and not all projects.


Tags

Share the post

26 February, 2024

So.. here we are, you have an idea for a software solution, you’re excited about it. 

If you have any connection at all with the IT industry, someone has probably already told you that you should start…

29 November, 2023

After two+ years of experience with Go, there are some topics I'd like to share based on my practical knowledge.

In this article, you will learn what is gRPC-gateway, how it works, see real-life examples, and as bonus, we will…

24 October, 2023

You can have a great product and zero customers. 

How?

In an interview for Amplifyre,…

23 October, 2023

Introduction

In the vast and ever-evolving world of web development, Laravel has emerged as a framework that has gained immense popularity and enjoyment of use among developers. With its…